Fatekeeper weapons guide
Fatekeeper Weapons Guide: Armor, Artifacts, and Smart Loadouts
Choose gear in Fatekeeper by role, recovery, range, armor feel, artifact triggers, and upgrade timing. This source-aware guide explains how to judge weapons without pretending Early Access already has a final item database.
Official Fatekeeper and Steam material confirms weapons, armor, artifacts, combat styles, progression, and weapon coatings. Exact stats can change during Early Access, so this page separates confirmed systems from practical loadout advice.
Fast Answer
The best Fatekeeper weapon is not simply the highest damage option. Start with a dependable melee weapon whose reach and recovery you understand, pair armor with the mistake you actually make, and choose artifacts or relic effects that trigger during your normal rhythm. Heavy gear works when you punish committed attacks; agile gear works when you can reposition cleanly; spell-support gear works when magic creates safe openings instead of replacing fundamentals. Until item data is stable, track every weapon by role, range, recovery, upgrade cost, and confirmed source.
Decision matrix
How to Choose a Fatekeeper Weapon Before a Full Database Exists
Use this table as a gear decision filter. It keeps the page useful even when exact damage values, upgrade names, and item locations change across Early Access updates.| Gear question | What to check | Best fit | Warning sign |
|---|---|---|---|
| Can the weapon punish safely? | Reach, startup, recovery, stamina pressure, and how often you get hit after swinging | Balanced and heavy melee builds | You land damage but always take a trade afterward |
| Does the armor match your movement? | Protection gained versus slower repositioning, dodge timing, and confidence in narrow rooms | Exploration and first-run survivability | The armor hides bad timing but makes spacing worse |
| Does the artifact trigger naturally? | Whether the effect activates during blocks, dodges, casts, finishers, or exploration habits you already use | Focused builds with repeatable habits | The bonus is powerful on paper but rarely appears in real fights |
| Can magic support the weapon? | Cast exposure, interruption value, range control, and whether a spell creates a clean melee opening | Sword-and-sorcery hybrids | You cast because you are panicking, not because the window is safe |
| Is the upgrade worth committing? | How often the item solves fights, whether it overlaps with another tool, and how likely balance changes are | Anchor weapons and core armor pieces | Resources spread across every new item before one plan is proven |
Weapon roles
Weapon Roles to Separate in Your Notes
A useful Fatekeeper weapons page should organize tools by what they do for the player, not by invented tier claims. These roles map cleanly to confirmed sword-and-sorcery combat, progression, armor, artifacts, and exploration.
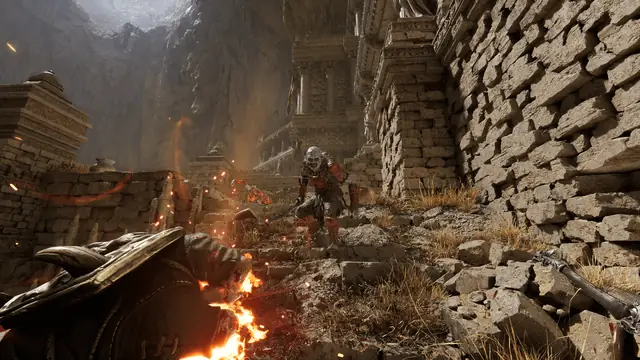
Reliable melee
Your anchor weapon is the tool you can use in almost every fight. It should have readable reach, safe recovery, and an upgrade path you can justify from repeated use. Do not replace it every time a new item looks dramatic.
- Test one-hit recovery before trying long strings.
- Upgrade the weapon you use in ordinary encounters.
- Keep notes on which enemies punish its recovery.
Heavy pressure
A punish weapon is slower but rewards patience. It works when you let the enemy commit first, then answer during recovery. It becomes weak if you swing first in crowded rooms or narrow corridors.
- Pair with armor that lets you survive one mistake.
- Use terrain to force one enemy at a time.
- Do not chase speed if the role is burst punishment.
Spacing tool
Control gear helps you hold range, interrupt pressure, or reset a fight. This can be a weapon, spell pairing, coating, or artifact effect. It is strongest when it supports a plan instead of replacing fundamentals.
- Measure whether it creates safe openings.
- Pair with magic only when cast exposure is manageable.
- Track which enemies resist or ignore the control effect.
Route safety
Exploration gear is not always the highest damage setup. It helps you survive unknown branches, conserve healing, and deal with mixed threats while you document routes and shortcuts.
- Favor consistency over showcase damage.
- Record whether the tool works in caverns, forests, and sanctuaries.
- Keep story spoilers separate from mechanical notes.
Armor
Match Armor Weight to the Mistake You Need to Fix
Armor should solve a real survival problem. If you die during recovery, heavier protection may buy time. If you die because movement feels late, lighter gear may teach better spacing. The right set depends on the failure pattern, not only defense numbers.- Use heavier armor when your main problem is surviving one committed hit after a punish window.
- Use moderate armor for blind exploration because it keeps defense and repositioning balanced.
- Use lighter gear only when you can read enemy windups and avoid panic dodging into bad terrain.
- Compare armor by how it changes your actual decisions: block timing, dodge confidence, healing windows, and route safety.
- Do not call one armor set best until current in-game evidence confirms stats, location, weight, and upgrade behavior.
Artifacts
Artifacts, Relics, and Coatings Should Reinforce a Behavior
Official Steam Community material for Fatekeeper mentions weapon coatings alongside weapons, armor, artifacts, combat styles, enemies, and bosses. Treat these systems as behavior modifiers until exact item data is verified.| Effect type | When it is useful | How to verify it |
|---|---|---|
| Block or guard support | For heavy melee players who wait for committed attacks and punish safely | Record whether the effect triggers on block, after block, or only under a narrow condition |
| Dodge or movement support | For agile builds that reposition often and avoid trading hits | Test whether it helps real fights or only feels good during travel |
| Spell or control support | For hybrids that use magic to interrupt, slow, or create openings | Write down cast exposure, resource pressure, and whether the spell opens a melee punish |
| Coating or temporary weapon effect | For specific enemy pressure or short route sections | Track duration, cost, enemy response, and whether it is worth using before a difficult room |
| Exploration or loot utility | For players mapping caverns, sanctuaries, and hidden lore routes | Separate convenience effects from combat power so the database stays searchable |
Upgrades
Upgrade Priorities for Early Access Gear
A good upgrade plan spends resources on repeatable value. Avoid upgrading every new discovery before one weapon, armor piece, or artifact has proven its job in multiple situations.Choose one anchor first
Pick the weapon or armor piece that appears in ordinary fights, not only boss-style moments. Upgrade the item that helps your normal route, then compare alternatives against that baseline.
Change one variable at a time
If a fight goes badly, change weapon reach, armor weight, artifact effect, or spell pairing separately. Full loadout swaps hide which choice solved the problem.
Label confirmed data
When you record stats, location, coating behavior, or upgrade costs, note whether the source is official text, current in-game observation, Steam material, or a conservative assumption.
Recheck after patches
Early Access updates can change balance, names, availability, or effects. Keep dated notes and update the page when current evidence proves a change.
Wiki tracking
What a Future Fatekeeper Weapons Database Should Record
This page is intentionally a guide first. A trustworthy database should be built from repeatable evidence rather than copied speculation.Item identity
Record the exact displayed name, type, role, screenshot evidence, and build date. If the name is not visible, describe the item conservatively until verified.
Stats and behavior
Track damage only with context: reach, recovery, stamina pressure, armor weight, coating duration, spell exposure, and artifact trigger conditions.
Location and route
Connect gear to location notes without spoiling story beats. A player should know where to look and what danger to expect before seeing late-game reveals.
Build fit
Link each item to balanced, heavy melee, agile precision, spell control, or exploration roles so readers can choose gear for a reason instead of chasing a fake final tier list.
Sources and Next Reading
Use official pages for confirmed platform and system language, then use this site for role-based gear planning and spoiler-aware guide routes.
Fatekeeper Weapons FAQ
What is the best Fatekeeper weapon?
The best weapon is the one that solves your current combat problem with reliable reach and recovery. A final best-weapons list should wait for current in-game stats and patch-stable evidence.
Does Fatekeeper have armor and artifacts?
Official materials describe weapons, armor, artifacts, combat styles, progression, magic, and exploration. This guide explains how to judge those systems without inventing unverified item stats.
Should I upgrade every new weapon?
No. Upgrade one anchor weapon or armor plan first, then compare new items against that baseline. Spreading resources too early makes it harder to learn what actually improved your build.
Are weapon coatings confirmed?
Steam Community material for Fatekeeper mentions weapon coatings in the context of weapons, enemies, bosses, and combat systems. Treat coating details as update-sensitive until verified in the current build.
How is this different from the builds guide?
The builds guide chooses a class-style path. This weapons guide focuses on evaluating gear roles, armor weight, artifact triggers, upgrades, and future database rules.